 Success-Plan Services
.jpg) Brian Senese
Brian Senese

In last week’s Part 1 blog, we walked through steps 1, 2 and 3 of developing your first Data Distribution ServiceTM (DDS) application with RTI ConnextⓇ. As we begin Part 2, you should now have source code that is ready to be modified. In this tutorial, we will finish the process of application creation by modifying the source code – both Publisher and Subscriber – and then build and test the applications. Again, the use of RTI tools make this “easy”. Though it seems that in the engineering world nothing is “easy” – but just imagine not having these tools when approaching all the potential challenges that a developer can face. Let's continue!
4 - Modify source code
The next step is to modify the Publisher source code to assign meaningful values to the data. In its present state, the data set remains unpopulated. I’ve used Eclipse; its editor works well and autofills variable names, making modification easier. All generated source files (including README and makefiles) have been copied into an Eclipse project called blog (a directory is now created inside of the Eclipse workspace containing all DDS source) and this is shown below. Blog_publisher.cxx is the module that publishes the data set in real time – modifying this module to set the data is the object of this next exercise.
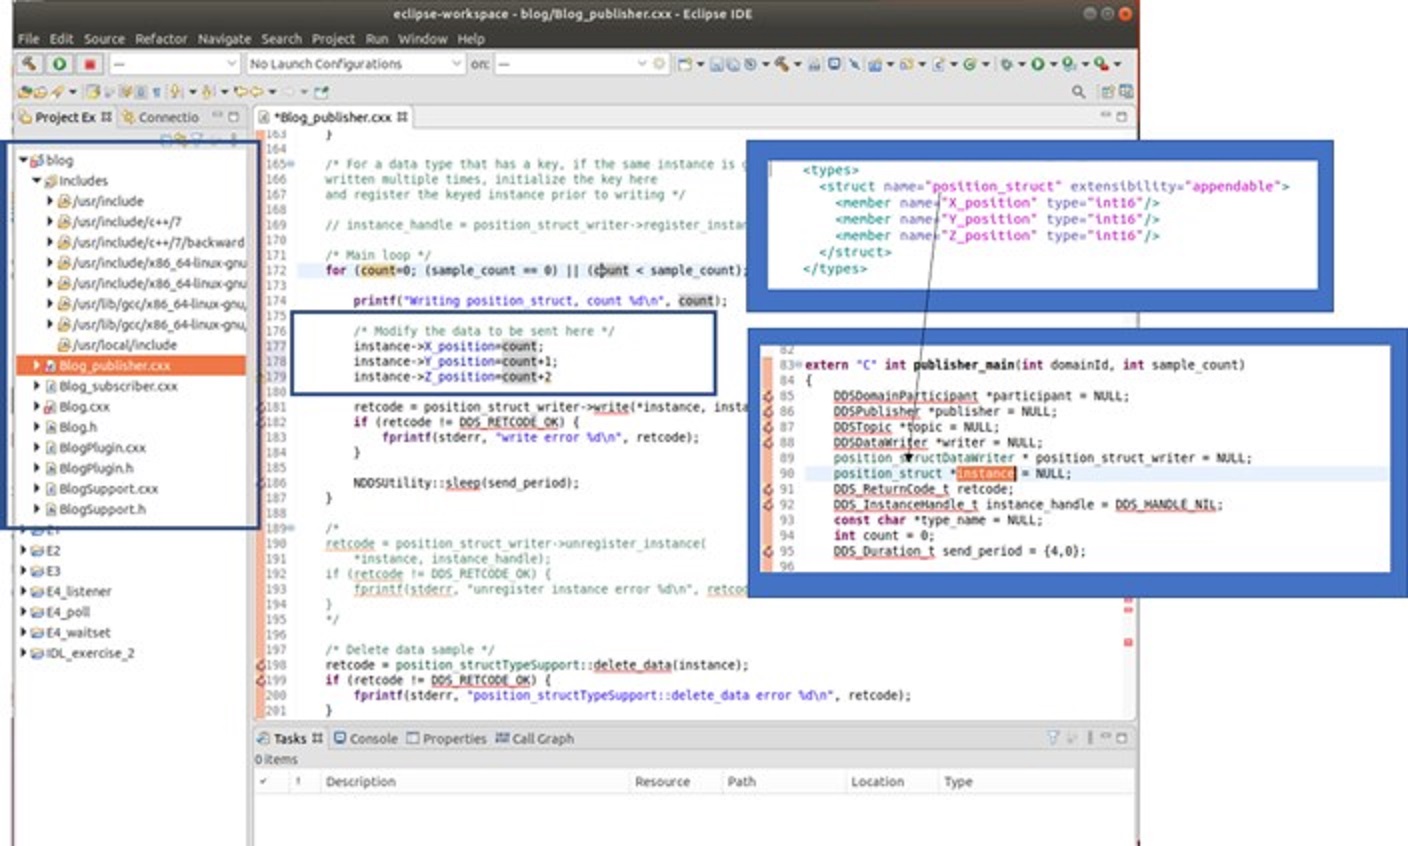
The XML data definition (taken from blog.xml) is shown (for reference) inside the blue box and represents position related information; the name of the data structure is position_struct. Within the generated code, position_struct is created and referenced by instance. Setting each component (X, Y and Z position) of instance is accomplished by adding the following lines under the section /* Modify the data to be sent here */
Instance -> X_position = count;
Instance -> Y_position = count+1;
Instance -> Z_position = count+2;
count is used to set each variable, only because it is a convenient (readily available) loop counter. Changing X, Y and Z values are published in real time, allowing subscribers to receive changing samples and print incrementing position samples. Eclipse will provide an autofill list once instance is specified as a data type – you can select associated data types to assign a value to. This is convenient when dealing with larger data structures.
Click for a larger version of the image
One last code modification must be made to guide both Publisher and Subscriber(s) to use the correct Quality of Service (QoS) library (RTI_Shapes_Lib) and QoS profile in that library (History_KeepLast_20). The Publisher and Subscriber need to extract the correct QoS from the many profiles that are inside the library. Simply modify the Publisher and Subscriber (as shown below) with a slightly different API that points to the library and profile to use.
Blog_publisher.cxx modification

Blog_subscriber.cxx modification

5 - Build the executables and run the application
With all software modules resident in the Eclipse workspace (home/Eclipse_workspace/blog), it's easiest to build from this location. The Readme.txt file explains how to build the executables, but there is a trick that adds greater convenience to the process.
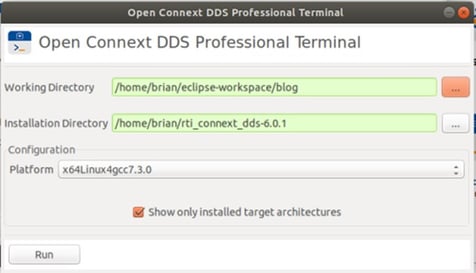
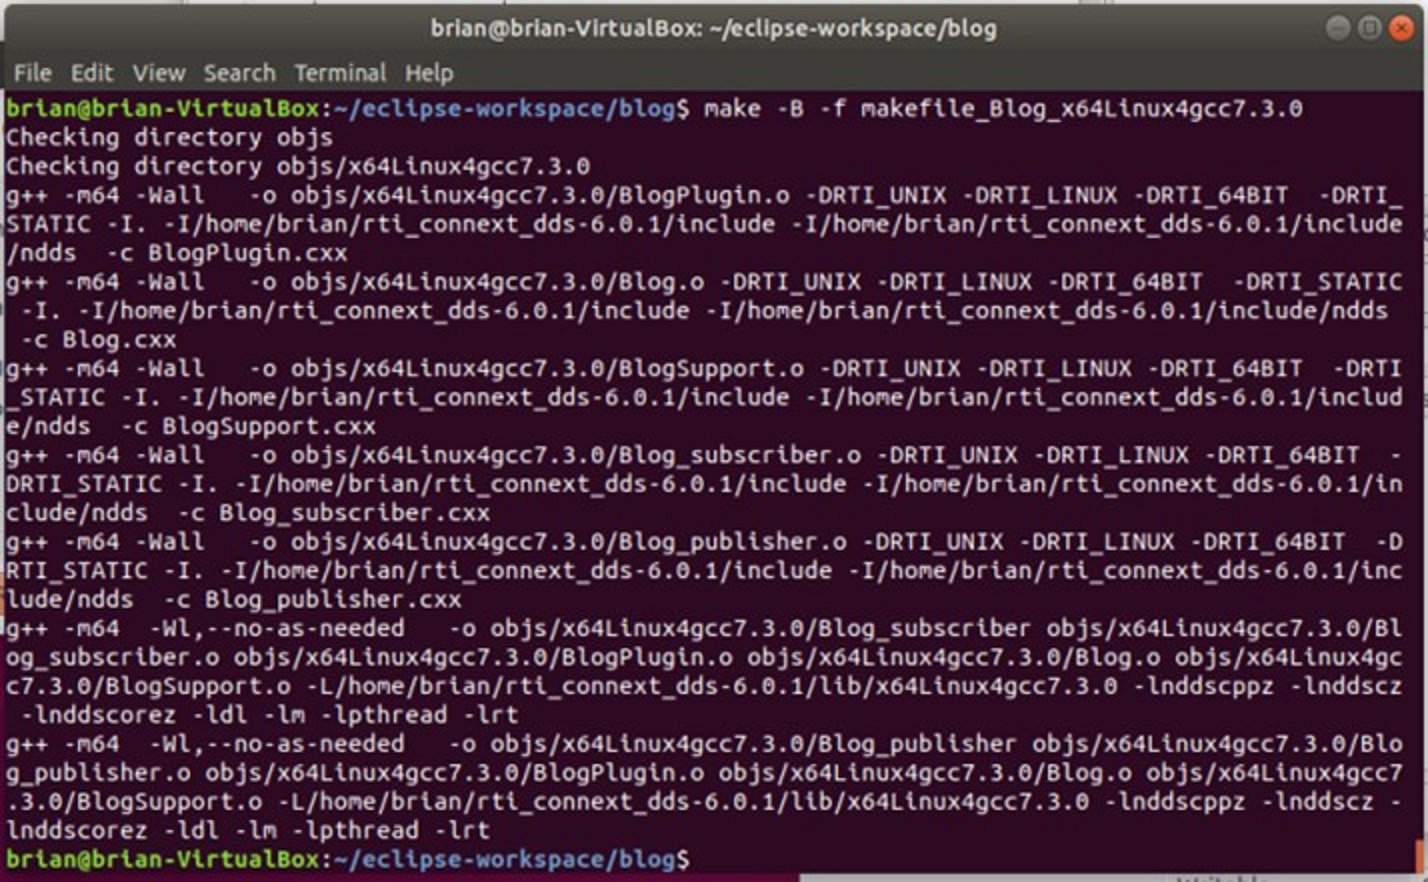
Within a terminal window, a makefile (makefile_Blog_x64Linux4gcc7.3.0) is executed to compile and link code. For this to be successful, environmental variables need to be defined – such that they provide path information in terms of finding dependencies, such as include files and libraries. This environment is easily set up by using a utility called Connext DDS Professional Terminal. Within this utility, set the working directory to the location of the source code and Run the utility – a terminal window will appear, and the environment will be set up.
Within the terminal window, enter the build command as specified in the README_x64Linux4gcc7.3.0.txt file. (Your Linux system may be different, therefore the makefile name may include a different Linux and gcc version. )
Click for a larger version of the image
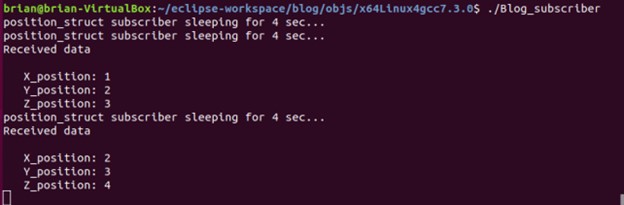
Publisher executable and Subscriber executables are ready to run – they have been placed into a release subdirectory by the makefile (in my case, they are in /objs/x64Linux4gcc7.3.0 ). Copy the Blog.xml file into this directory and rename it USER_QOS_PROFILES.xml. This will be the default file that the Publisher and Subscriber will look for and load when they startup. To get the Connext DDS system operational, create two terminal windows using the DDS Professional Terminal utility, and run the Publisher and Subscriber applications.
Publisher

Subscriber
6 - Verify operation
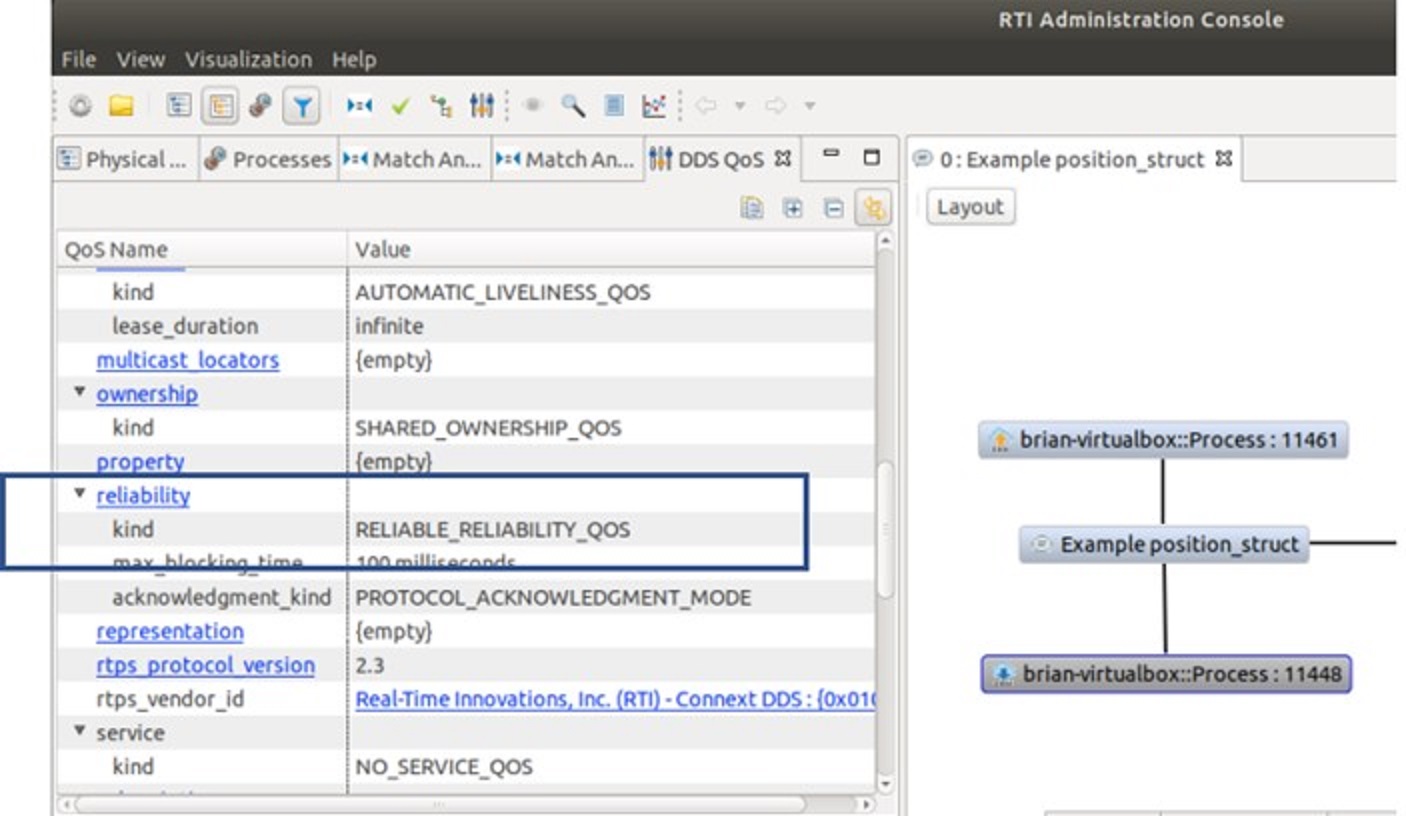
RTI’s Admin Console is one of several test tools that is able to verify operation. This tool can display connections made between nodes, as shown in the right window of the program. Selecting a node (identified as a process number -> brian-virtualbox::Process: ----) allows the QoS of that node to be shown. The left window shows the QoS of this node (under the DDS QoS menu tab). Reliability is shown to be set, as we had expected.
Click for a larger version of the image
Concluding thoughts
Understanding DDS operation is an important aspect when assessing whether it’s a technology that is well-suited to an application. However, this is just the first step in moving toward a proof-of-concept or full implementation. This short overview is intended to illuminate the development path, identify the steps taken to produce a working system and highlight the tools that are available to quickly accelerate your progress. All the steps are fairly straightforward, though admittedly some practice in using the tools mentioned could be very useful. System Designer is somewhat intuitive to navigate, but does take some exploration to get running. Due to its many capabilities, Admin Console is fairly involved by comparison, so our recommendation is to review the users manual to understand a bit more about the different ways it can be used.
As RTI’s FAE in Southern California, I would be happy to be your guide in taking you through the process of creating your own application. For more information in a video format, I recently presented a three-part webinar series called “Getting Started with DDS”, and all three episodes are now also available on demand.