 Success-Plan Services
Publishing Instances at Runtime
Now that we can subscribe to topics and spawn new objects when new instances are discovered, let's look at how we can dynamically publish and stop publishing. There are different ways this can be done. We could use the same approach as for the subscriber and create a new Shapes dynamic publisher class. However, in the case of the publisher the code for the static publisher and dynamic publisher is almost the same. The difference is that for the static instance, the object gets configured through the Blueprint Editor. In the case of dynamic creation, the configuration needs to be done through an init function. What needs to be configured is the color, and domain id. The color can be set in the Blueprint instance if we have a different instance for each shape.
First we need to add a few things in Shapes.pub.h. Like we did for the subscriber, we need to have a list of colors to set. Let's add the following to the header file.
/* Colors */
UPROPERTY(EditAnywhere, Category = "Color")
UMaterial* Purple;
UPROPERTY(EditAnywhere, Category = "Color")
UMaterial* Blue;
UPROPERTY(EditAnywhere, Category = "Color")
UMaterial* Red;
UPROPERTY(EditAnywhere, Category = "Color")
UMaterial* Green;
UPROPERTY(EditAnywhere, Category = "Color")
UMaterial* Yellow;
UPROPERTY(EditAnywhere, Category = "Color")
UMaterial* Cyan;
UPROPERTY(EditAnywhere, Category = "Color")
UMaterial* Magenta;
UPROPERTY(EditAnywhere, Category = "Color")
UMaterial* Orange;
UPROPERTY(EditAnywhere, Category = "Color")
UMaterial* Default;
At the end of the file we need to add two new methods, one to initilalize and a second one to stop publishing.
void Initialize(int32_t myDomainId, FString myColor);
void StopPublish();
In ShapePub.cpp we need to implement the initialization function.
void AShapePub::Initialize(int32_t myDomainId, FString myColor)
{
  Color = myColor;
  DomainID = myDomainId;


  if (myColor == "PURPLE") StaticMesh->SetMaterial(0, Purple);
  else if (myColor == "BLUE") StaticMesh->SetMaterial(0, Blue);
  else if (myColor == "RED") StaticMesh->SetMaterial(0, Red);
  else if (myColor == "GREEN") StaticMesh->SetMaterial(0, Green);
  else if (myColor == "YELLOW") StaticMesh->SetMaterial(0, Yellow);
  else if (myColor == "CYAN") StaticMesh->SetMaterial(0, Cyan);
  else if (myColor == "MAGENTA") StaticMesh->SetMaterial(0, Magenta);
  else if (myColor == "ORANGE") StaticMesh->SetMaterial(0, Orange);
  else StaticMesh->SetMaterial(0, Default);
}
All the stop publish function has to do is to call Destroy to delete the object. However, Unreal Engine objects are not immediately deleted. They are marked for deletion and will be deleted when the garbage collector is running. This can take a while after the destroy call. What this means is even though the object is deleted it will hang around in the UI for a while. If you would like the object to be immediately deleted, you can force the garbage collector to run as in the example below.
void AShapePub::StopPublish()
{
    Destroy();
    GEngine->ForceGarbageCollection(true);
}
The next step is to create a way to spawn the publisher. There are a lot of ways to do this. One option is to create a UI with buttons for different publishers, when a certain event occurs, or by pressing a key on the keyboard. Since those are different options on how to create events in Unreal Engine, we will not go into details in this tutorial.
In order to get and process key events we need a player controller. Go to the C++ classes/Unreal_Shapes and right click. Select create new C++ class and select PlayerController as parent class.
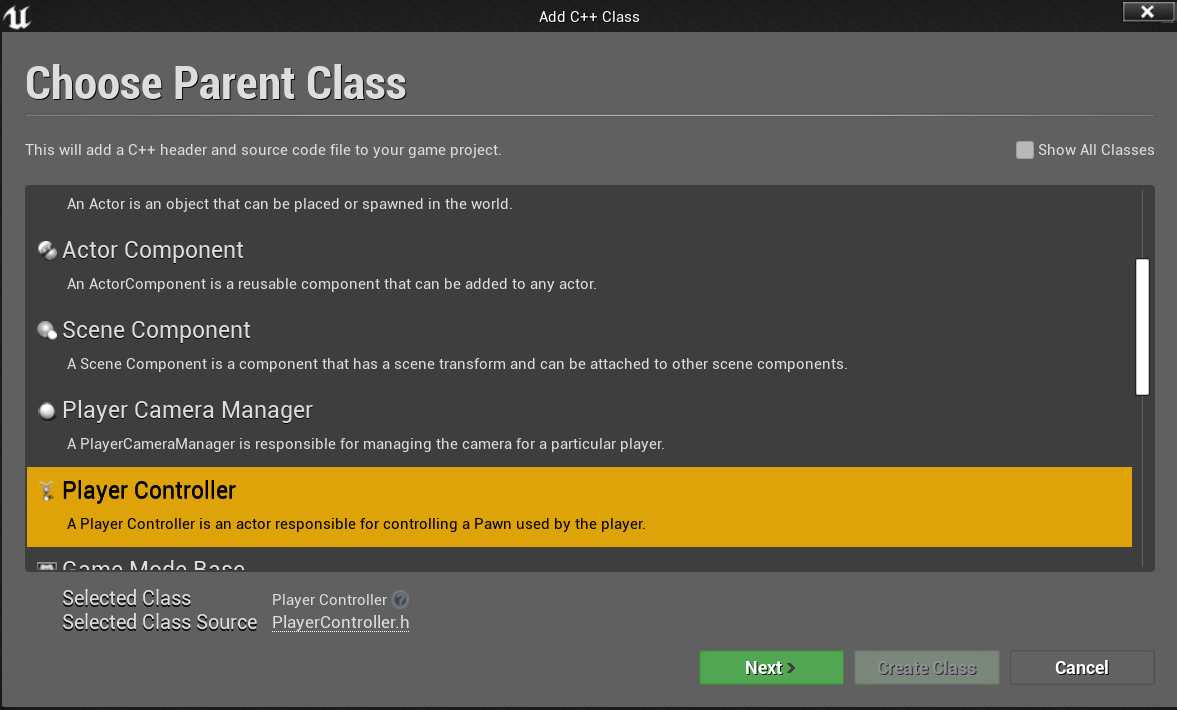
Give it a name. In our example we use ShapesPlayerController.

This will open the Visual Studio project and a new set of files, ShapesPlayerController.h and ShapesPlayerController.cpp, have been added to the project.
For this example we use a simple key event. Pressing “R” will start a red square publisher and pressing “R” again will stop the publisher. As for creating subscribers in the game mode class, we need variables where we can set the instances which need to be spawned. The header file has the code below. We need to override the SetupInputComponent method so we can create the key bindings. In addition, we need a method to toggle the subscriber. This is the function which needs to be called every time the key “R” is pressed.
public:
     UPROPERTY(EditAnywhere, BlueprintReadWrite, Category = "Shape Publisher")
     TSubclassOf<class AShapePub> SquarePub;

     UPROPERTY(EditAnywhere, BlueprintReadWrite, Category = "Shape Publisher")
     TSubclassOf<class AShapePub> CirclePub;

     UPROPERTY(EditAnywhere, BlueprintReadWrite, Category = "Shape Publisher")
     TSubclassOf<class AShapePub> TrianglePub;

     /* Domain ID */
     UPROPERTY(EditAnywhere, BlueprintReadWrite, Category = "Shape Publisher")
     int32 DomainID = 0;

private:
     AActor* Publisher = NULL;

protected:
     virtual  void SetupInputComponent() override;

     bool ToggleSquarePublisher(FString color);

     void HandleKey();
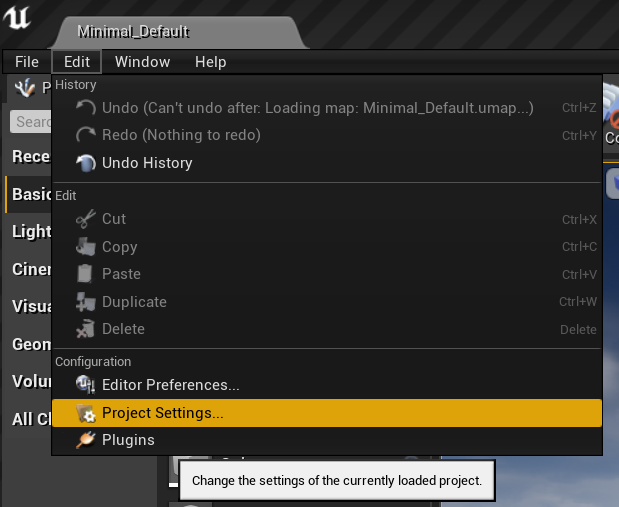
In order to bind a key event to an action, an input binding must be set up. Open the project configuration:
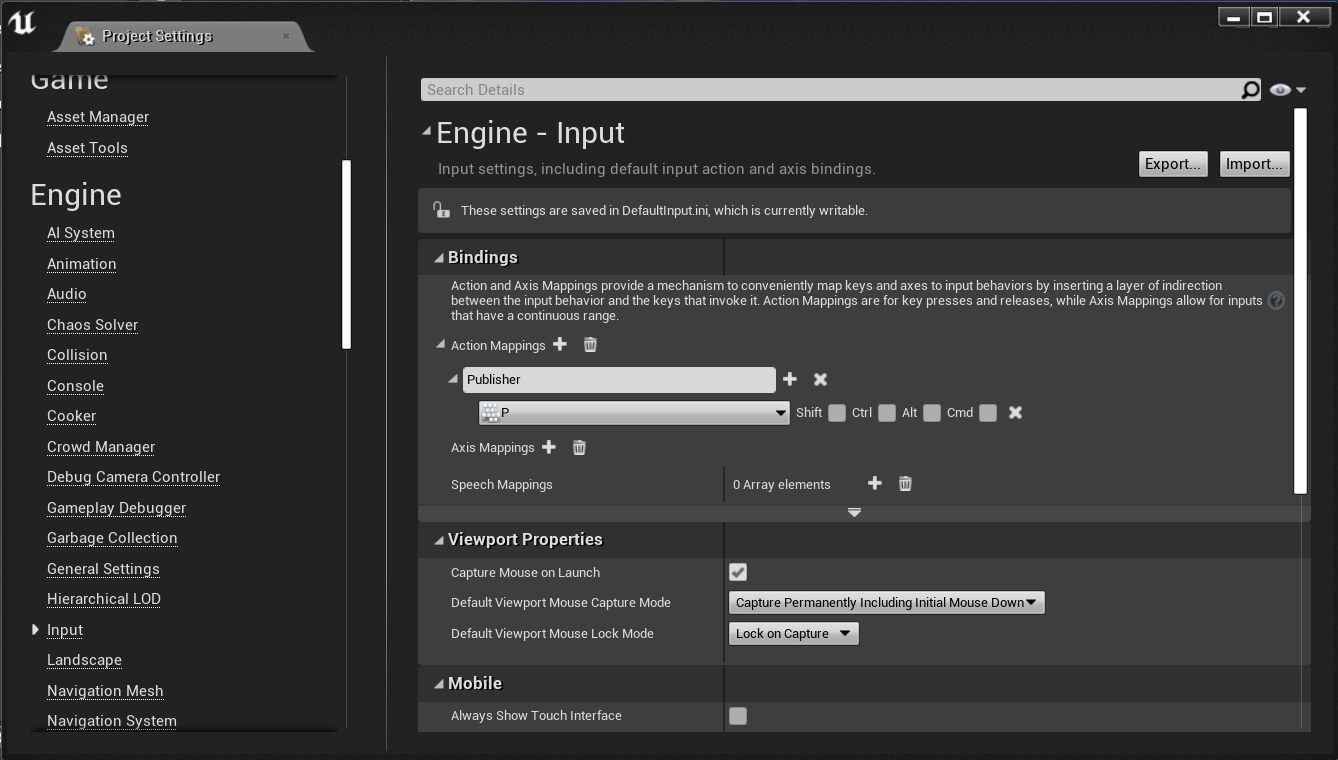
Select the input configuration. Add a new binding which will be called “Publisher” and it binds to the “R” keyboard key.

Now that we have an input binding defined, we need to assign an action to the binding in SetupInputComponent.
void AShapesPlayerController::SetupInputComponent()
{
     Super::SetupInputComponent();


     InputComponent->BindAction("Publisher", IE_Pressed, this, &AShapesPlayerController::HandleKey);
}
Everytime the “R” key, which is defined as Publisher binding in the project setting, the function HandleKey is called. All the HandleKey function does is to call TogglePublisher with a color (RED).
void AShapesPlayerController::HandleKey()
{
     ToggleSquarePublisher("RED");
}
In the ToggleSquarePublisher a publisher is created if it doesn’t exist, otherwise the existing publisher is deleted. The function is reflected below. Since we need to configure the publisher, the SpawnActorDeferred method is used. So the new spawned object can be configured before it actually spawns. This ensures that the configuration is done before BeginPlay of the newly spawned object is called.
bool AShapesPlayerController::ToggleSquarePublisher(FString color)
{
     bool retval = false;
     UWorld* World = GetWorld();
     FActorSpawnParameters SpawnParams;
     SpawnParams.bNoFail = true; /* Ignore any collisions when spawning */
     const FTransform SpawnLocAndRotation;


     /* Check if we have a publisher or not */
     if (Publisher == NULL)
     {
          /* Create a new publisher */
          Publisher = World->SpawnActorDeferred<AActor>(SquarePub, SpawnLocAndRotation);
          AShapePub* s = Cast<AShapePub>(Publisher);
          s->Initialize(DomainID, color);
          s->FinishSpawning(SpawnLocAndRotation);
          retval = true;
     }
     else {
          AShapePub* s = Cast<AShapePub>(Publisher);
          s->StopPublish();
          Publisher = NULL;
          retval = false;
     }
     return retval;
}
In the game mode controller class, we also need to set the PlayerController. First we need to include the ShapesPlayerController header file
#include "ShapesPlayerController.h"
and set it in the constructor.
AUnreal_ShapesGameModeBase::AUnreal_ShapesGameModeBase()
{
PlayerControllerClass = AShapesPlayerController::StaticClass();
}
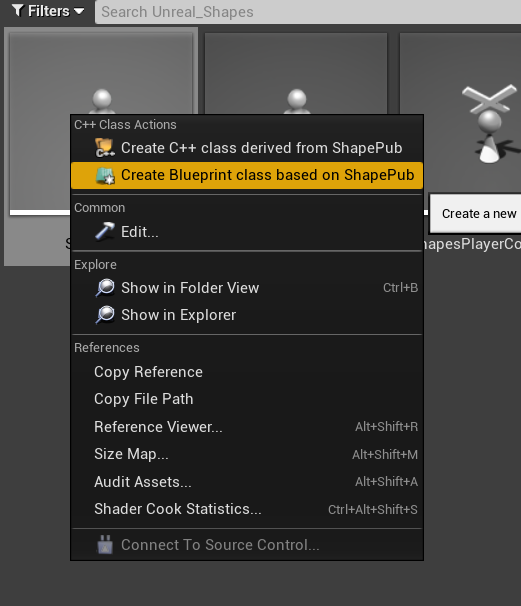
Now that we have our C++ classes, we need to create the different Shapes publishers. To do this right, click on the ShapePub class and select “Create Blueprint class based on ShapePub”.
The new Blueprint class will be SquarePub Dynamic: A dynamically spawned square publisher.

As for the previous square classes, select the static mesh in the components window and set the static Mesh to a cube of 100x100x100 and the scale to 0.3 for all axes. This will be similar to the default shapes size of 30.
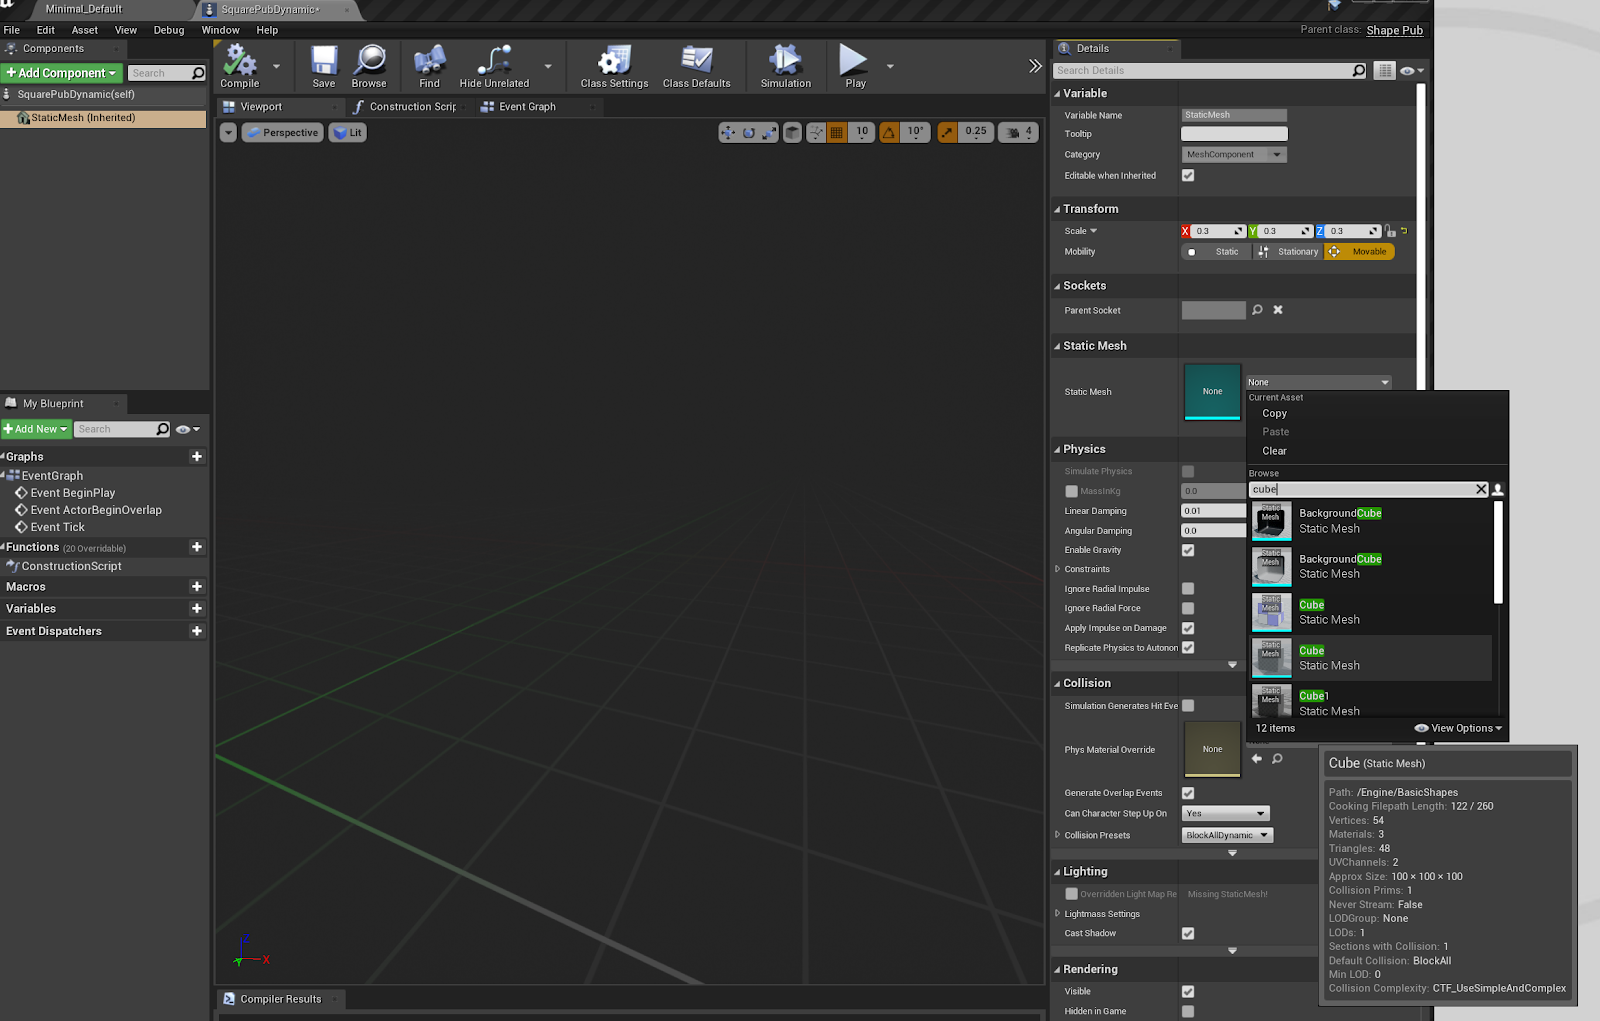
Next select the CirclePubDynamic component and set the materials for the different colors.

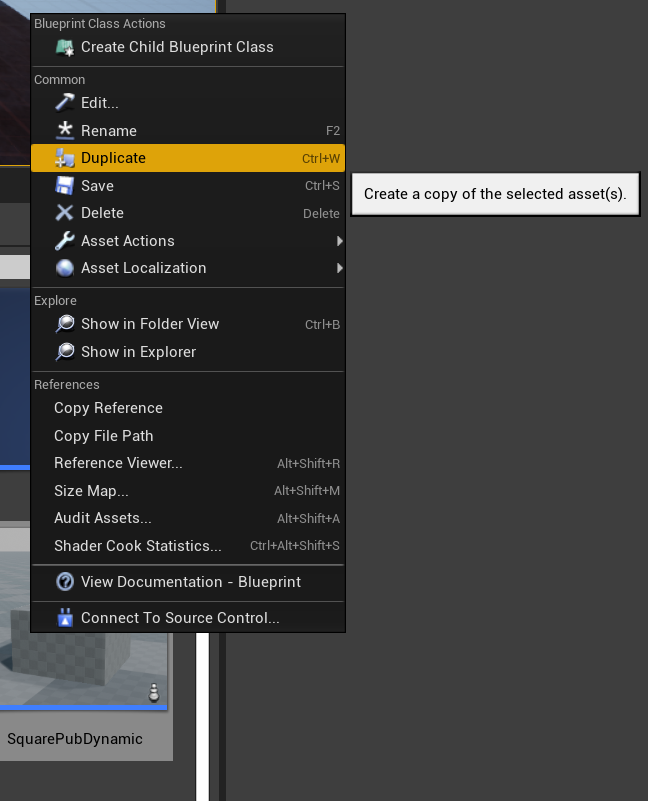
Although we only create a square publisher in our player controller, we can create classes for Circle and Triangle publishers. They are almost identical. The exception is the static mesh setting. We can easily create those classes by right clicking on SquarePubDynamic and selecting Duplicate. Make two duplicates and rename one to CirclePubDynamic and the second one toTrianglePubDynamic. Set the static mesh to a sphere and cone, respectively.
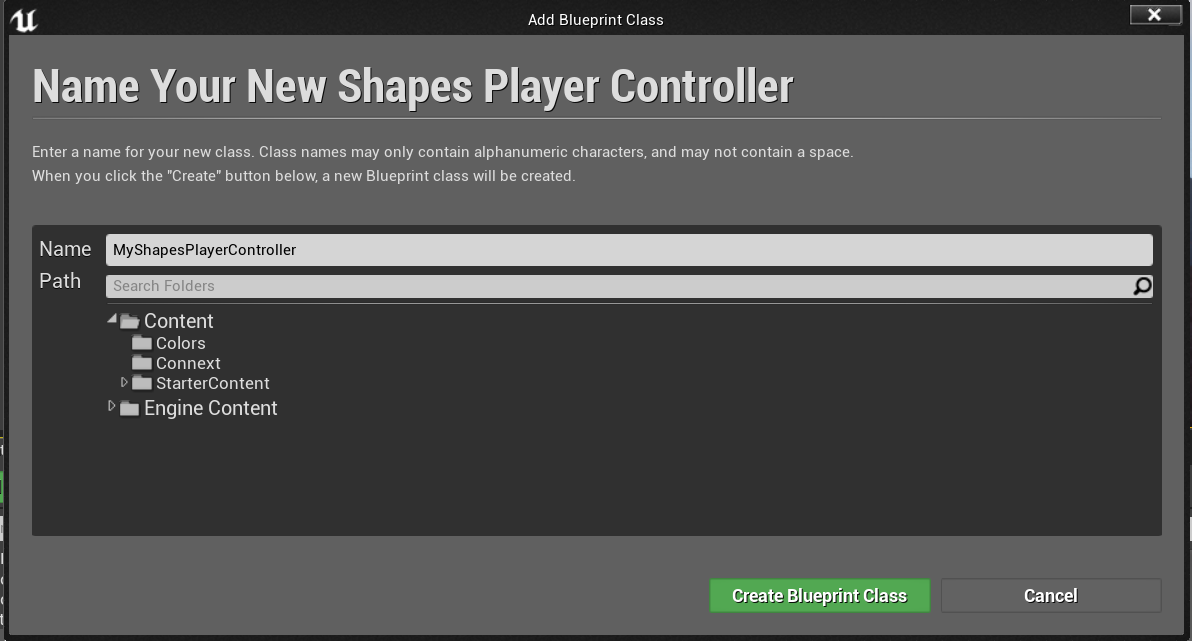
Next create a blueprint class from the player controller and name it MyShapesPlayerController.

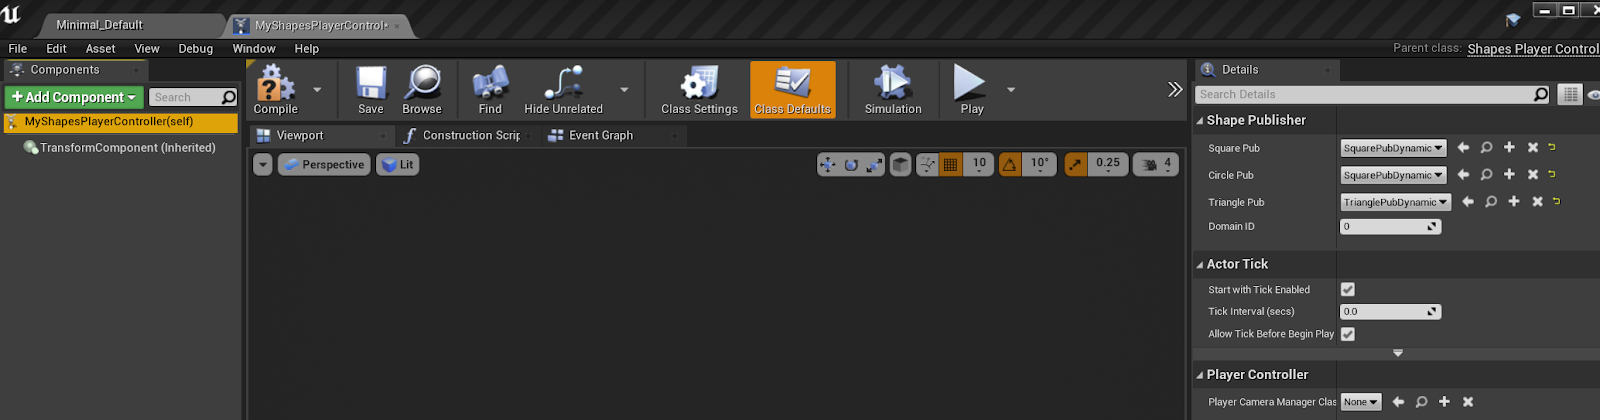
Open the new create MyShapesPlayerController class and set the Shape Publisher details. Set the classes associated with the shape to be published and the domain id.
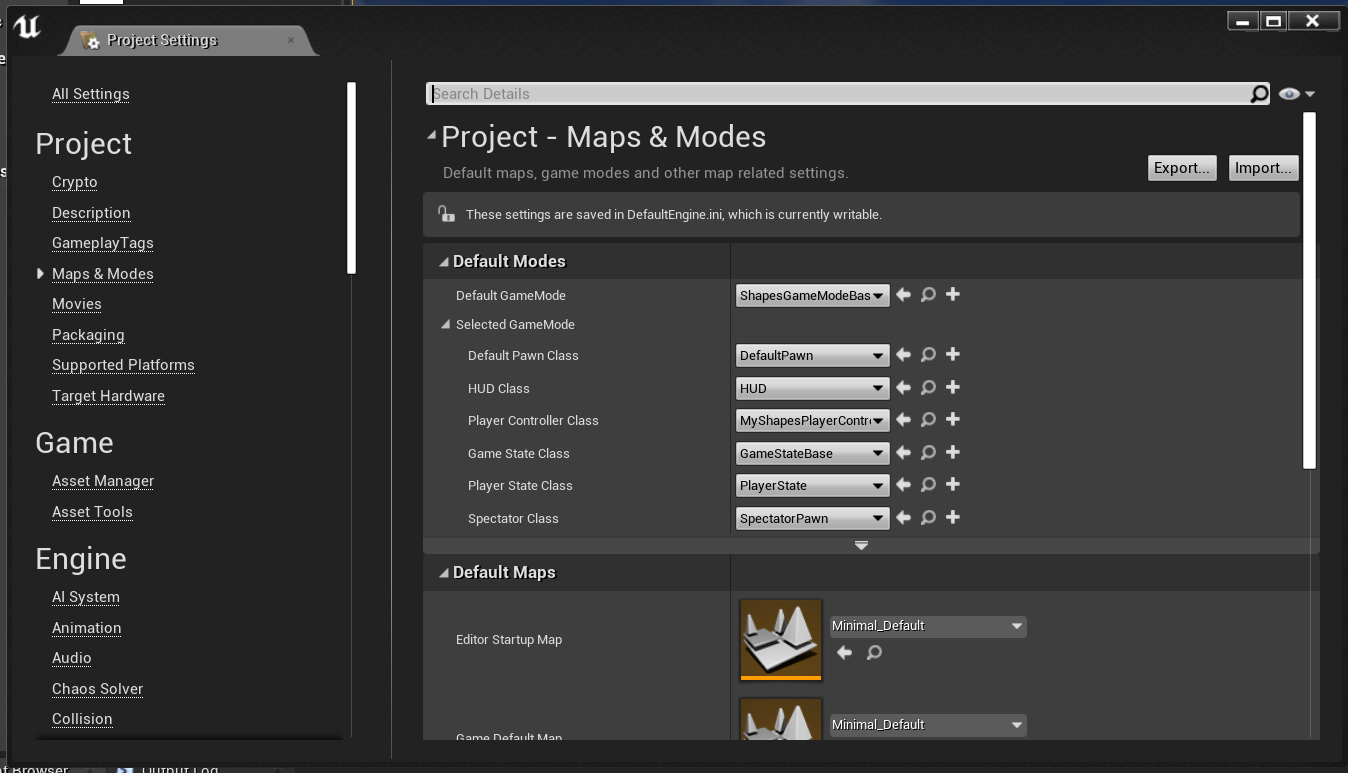
In the project settings under Maps & Modes, set the Default Game Mode to ShapesGameModeBase and the Player Controller Class to MyShapesPlayerController.
Make sure to save all and then hit play. When pressing “R”, a red shape publisher should be created and when pressing “R”, again the publisher is destroyed.