 Success-Plan Services
Extending the Data Type to 3D
The shapes type is defined to be used with the Shapes application which is two dimensional. Therefore the type only has two axes X and Y. However in Unreal Engine we have three dimensions and the shape bounces around in a 3 dimensional space. We need to extend the shapes type to add a 3rd axis (Z). At the same time we still want the Unreal Engine being able to communicate with the Shapes application. Luckily the DDS standard supports extensible types which allows to add elements to the data type. Newer applications can publish or subscribe to the extended type. If data from the previous application is received the missing fields are being replaced with default values. At the same time if an existing application received the newer data type the new elements are being removed. To extend our data type let’s go back to System Designer and create a new type called ShapeTypeExteded3d which is based on the ShapeTypeExtended. We add a ned struct to the Types tab.

The new type is called ShapeTypeExtended3D.
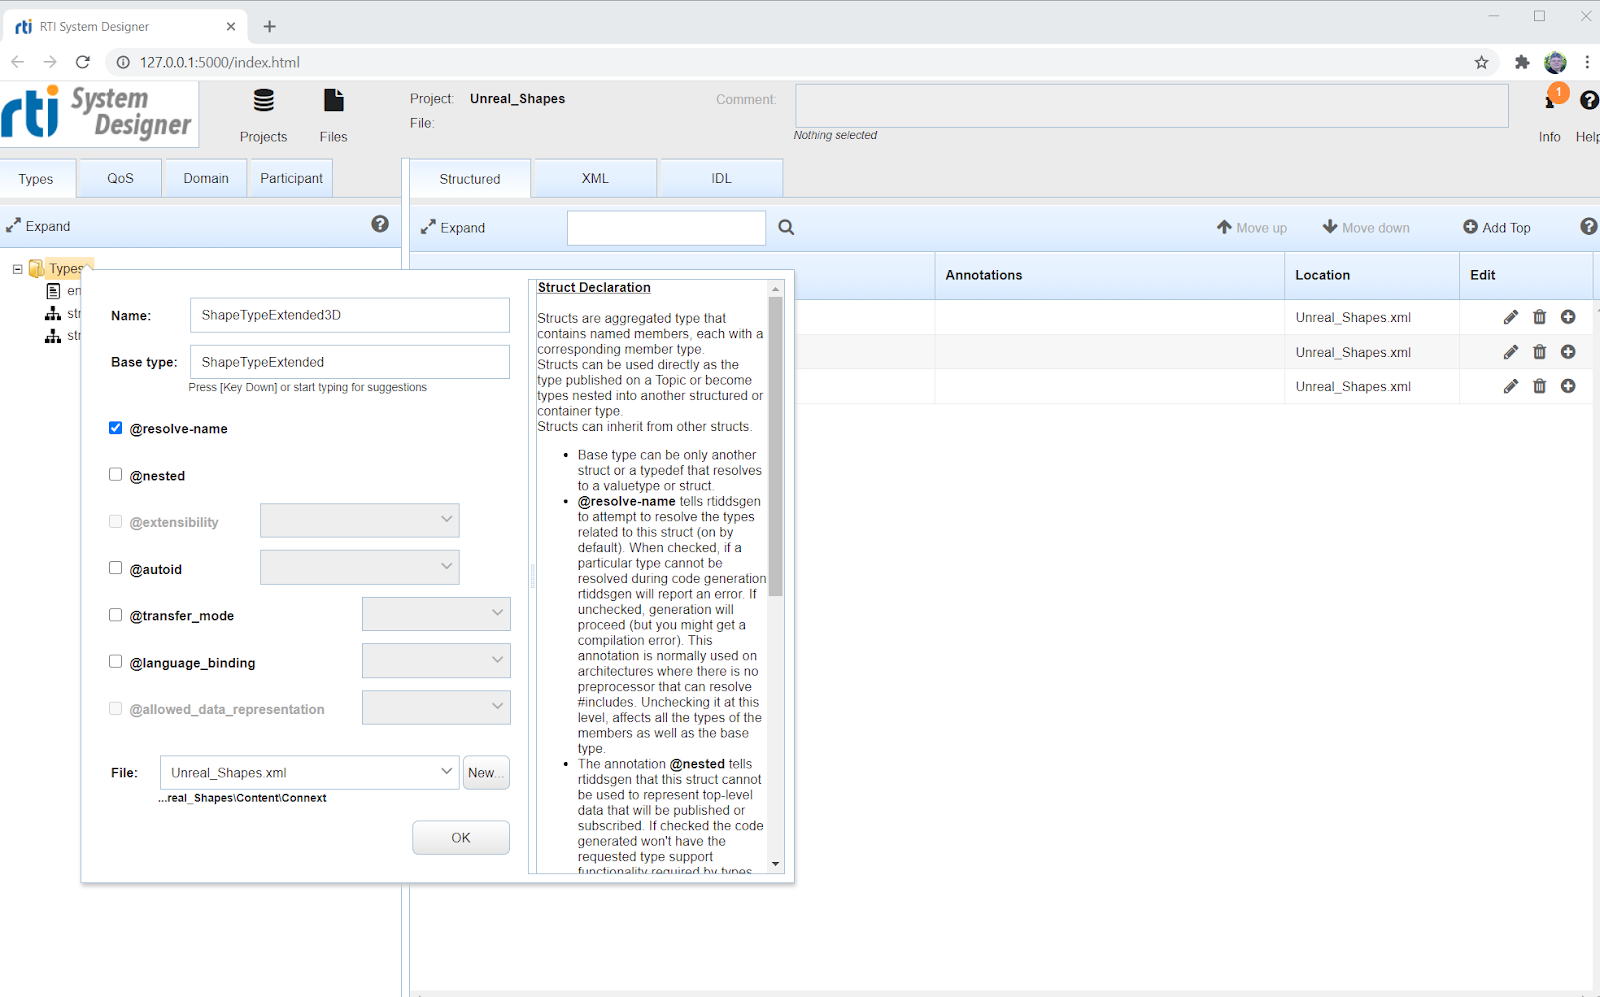
Then we add an element to the new type.

The new element is an int32 we call “z” with a default value of zero.

The types tab now looks as follow:

Next we have to change the code to make use of the new type. In ShapesSubscriberManager.h, ShapePub.h, and ShapeSub.h change:
FString TYPE_NAME = FString("ShapeType");
to:
FString TYPE_NAME = FString("ShapeTypeExtended3D");
Wherever we read or write samples we have to add the 3rd axis. This will be in the Tick method of the publisher and subscriber classes. In ShapePub.cpp add the line in bold.
if (writer != dds::core::null)
{
    sample->value<int32_t>("x", MaxBox.Y - Location.Y);
    sample->value<int32_t>("y", MaxBox.Z - Location.Z);
    sample->value<int32_t>("z", Location.X);
    writer->write(*sample);
}
In ShapeSub.cpp and ShapeSubDynamic.cpp should look as follows:
if (sample->info().valid())
{
    int32 x = sample->data().value<int32>("x");
    int32 y = sample->data().value<int32>("y");
    int32 z = sample->data().value<int32>("z");
    FVector Location(z, 250 - x, 250 - y);
If you publish from within the Unreal Engine you will now see in Admin Console that vapes for all three axis is published.
